
A workman’s staple, the hole saw is a tool you’ll encounter as you start to flex your DIY muscles and branch out into more interesting challenges. They’re used to cut perfectly round holes in a variety of materials. Wood and plaster are common workpieces, but metal, glass, ceramic, concrete, and stone still fall to the hole saw.
Despite the name, this tool looks more akin to a drill bit than a saw – in fact, its cutting edge rests at the end of a large diameter cylinder, and this is spun on a power drill to cut through your chosen material.
Where might you use a hole saw? Here are just a few ideas:
- Installing hardware (such as dead bolts or locks) on doors
- Cutting holes in ceilings to accommodate light fixtures or fittings
- Cutting holes to accommodate drainage or waste pipes
- Making extra connections in pre-existing pipework
- Cutting vents in masonry
- Cutting holes for cables and wires
That list is far from comprehensive, but it illustrates the tool’s diverse array of applications. Learning to use a hole saw is undeniably useful, so let’s get into:
- What a hole saw is
- Why you should use one
- The types available and how to choose the right one
- How to attach hole saw to drill
- How to operate your hole saw
- How to care for your hole saw
- How to keep yourself safe
All in all, you’ll find yourself fluent in hole saw by the time you finish reading this post.
What is a Hole Saw?
Also known as a hole cutter, and sometimes spelled ‘holesaw’, the hole saw is easy to understand but deceptively tricky to master. Let’s start by covering what it is, how it works, why you’d use one, and what components it’s made from.
The hole saw is a large diameter, hollow drill bit with a keen cutting blade along the outer edge. Attach one to a power drill and it rotates at high speed, cutting precise holes into anything from bathroom basins to external walls. The depth of cut is limited by the hole saw’s cup-like shape, but a variety of bit types are available to work around varying requirements.
Metal Cylinder
The body of a hole saw is a wide diameter metal cylinder. Regardless of your cutting edge, steel is standard across the lion’s share of industries. The cylinder is mounted on an arbour, and you’ll notice slots cut into its walls to facilitate the ejection of chips and dust for smooth performance and to prevent stuck blades. Slot number varies between makes and models – 6 is generally the upper limit since more would compromise the hole saw’s strength, and we wouldn’t want that.

Cutting blade
Here’s where things get interesting. The metal cylinder of each hole saw culminates with an edge that uses either serrated saw teeth, gulleted/square teeth, or ultra-hard embedded materials to cut through your workpiece.

- Serrated Saw Teeth: Typically set at a 60° angle to allow a penetrating bite into the material being cut, saw teeth are far and away the most common cutting edge. Use saw tooth hole saws for wood, plaster, softer metals, and plastic.
- Gulleted/Square Teeth: Teeth are wider set since raw power is preferred over fine cuts. You’ll use gulleted or square tooth hole saws with more abrasive surfaces, including concrete, brickwork, ceramic tiles, glass, and stone.
- Coated: No teeth are used at all. Instead an ultra-hard material, usually tungsten carbide or diamond, coats the cutting edge. More of a niche tool, you’ll use coated hole saws to cut through heavy-duty metals, ceramics, and concrete. Unless you’re a professional, you’re unlikely to encounter the need.
You’ll also want to pay attention to the pitch of teeth and their TPI (Teeth Per Inch) rating, so let’s break down the impact of each factor.
Pitch
Pitch refers to the distance between the point of two teeth (serrated) or the middle of two teeth’s gullets (gulleted/square). A variable pitch hole saw varies that distance, while a constant pitch hole saw maintains the same distance.
- A variable pitch breaks the sawing rhythm; that might sound like a bad thing, but it inhibits vibration for a smoother cut, reduced blade wear, and lower noise levels. Chips and dust eject easily to reduce the chance of clogging or overheating.
- A constant pitch works slower but produces a much finer cut.
TPI
Understand TPI as a measure of tooth frequency along the blade. For example, 18 TPI means 18 teeth per inch, so that tooth frequency is higher than that of a 16 TPI hole saw. TPI numbers vary, but they stay within the general ballpark of 20 to 2.
- Blades with a higher TPI will cut slowly, but, less likely to tear at the fibres of your material, they also cut smoothly.
- Blades with a lower TPI cut faster, but they do tend to tear at fibres to produce a more ragged edge.
Arbor
The arbor isn’t specific to the hole saw, but it’s a vital part nonetheless. It’s the type of tool bit used to grip other moving tool components, essentially the connecting part between your hole saw and your power drill. Most, but not all, hole saws are supplied with an arbor – you’ll occasionally need to purchase your own, so pay attention when you buy.
As you’re browsing, you might consider seeking an arbor with a spring placed over the drill bit. These are known as ejector springs – they contract as you drill and then eject the slug (the cut segment) after the hole has been made.
Arbors can be broken down into fixed or detachable and small or large.
- Fixed Arbors: Said to have an ‘integral shank’, fixed arbors come attached to the hole saw blade. Using one means skipping any dismantling when you need to change saw size.
- Detachable Arbors: Unfixed to the hole saw, detachable arbors can be used with a variety of blades. Using one means skipping the need to purchase again for every hole.
Size comes down to the diameter across the flats of an arbor’s hexagonal shank – so, the distance between one flat face to the opposite flat face.
- Small Arbors: Have a shank size of 1/3-inch (8.75mm) and are used alongside hole saws with diameters between 14mm – 30mm (1/2 – 1 inch).
- Large Arbors: Have a shank size of 7/16 inch (11.1mm) and are used alongside hole saws with diameters between 32mm – 210mm (1 – 8 inches).
Hole saw sets often provide an arbor adaptor. This straightforward threaded attachment fits over your drill bit and onto the collar threads of a large arbor, allowing users to attach a smaller hole saw to the adaptor’s threads.
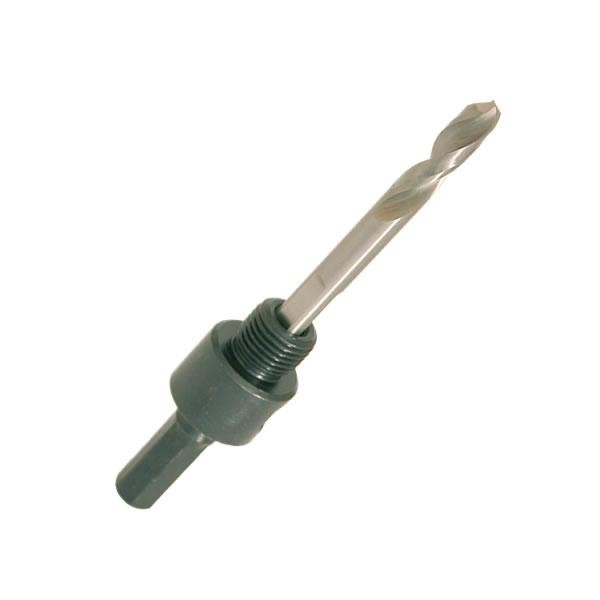
 Drill Bit
You’ll find a drill bit at the centre of each hole saw. Their function is to create a pilot hole, anchoring the hole saw in place to decrease any ‘wandering’ as the cut is made. At the other end of the drill bit is a blunt hexagonal shank that is inserted into and gripped by your power drill’s chuck.

Why Use a Hole Saw?
Let’s take a breath before diving into the particulars of using a hole saw to consider why exactly you’d want to. Other tools can cut holes, so what makes a hole saw the go-to among professionals?
- Leaves the Core Intact: A hole saw works without needing to cut up the core of your workpiece, a notable advantage over twist drills or spade drills, especially when dealing with larger holes.
- Reduced Friction: The walls of the hole saw cylinder are relatively thin, cutting through material with less friction than solid drill bits. Less power is needed, so less strain is placed on your drill and cutting time is drastically reduced. Expect to save on energy, battery life, and time.
- Versatility: A hole saw achieves a greater variation of hole sizes than rival tools – they are particularly valued for cutting large diameter holes.
Types of Hole Saws
We’ve covered how the individual components of a hole saw can differ, but more important is the variation between hole saw types. There are plenty from which to choose, and your decision should be based around:
- What you’re cutting
- How frequently and extensively you’re cutting
- Whether you work commercially or simply around the house
Keep those points in mind as you peruse our quick overview of common hole saw types:
- Carbon Steel: Your basic general-purpose hole saw performs admirably for the DIY expert or enterprising home-improver. Though not the most durable, carbon steel hole saws are ideal for use with softer materials, including wood, non-laminated plastic, and plasterboard.
- Variable Pitch Bi-Metallic: Bi-metal construction boosts safety by eliminating the chance of shattering, so consider these a good step-up for dealing with slightly tougher materials or working for longer periods. Many boast hardened teeth of high speed steel for faster cutting, and variability lets you cut at different speeds according to your chosen material. Best suited to hardwood, plywood, non-laminated plastic, plasterboard, and non-ferrous metals (such as aluminium, zinc, and copper).
- Deep Cut Variable Pitch Bi-Metallic: Not named through coincidence, the deep cut variable pitch bi-metallic hole saw drill will boast a cut depth up to 42.5mm. Otherwise, it retains the characteristics and benefits of the standard bi-metallic.
- Constant Pitch Smooth Cut: The constant pitch smooth cut hole saw utilizes high speed steel with a tough alloy body. Hardened, abrasion-resistant, and heat-resistant, they’re made for cutting stainless, tool, and mild steel. Plasterboard, wood, and thin plastics also work well. Something to note, the hexagonal shank will sport a slight indentation. Nothing to worry about – it just helps lock the shank into place.
- Tungsten Carbide Tipped: Tungsten carbide tipped teeth deliver fast cutting action and outstanding durability, ideal for those who expect to use their hole saw frequently and for extended periods. Often used as the construction industry’s multi-purpose option, they cut through all woods, plastics, tiles, and metals. Perhaps not quite necessary for personal use, but undeniably nice to have.
- Welded Shank Soffit Cutter: A non-detachable arbor is welded to the base plate, and the saw is made from high speed steel with a variable tooth pitch. A wide diameter makes them seem tailormade for cutting vent holes in soffit boards, and they work well with plywood, metal, and PVC.
- Diamond-Edged: Showcasing a conspicuous absence of teeth, such hole saws are either coated or infused with diamonds. The hardness and durability is exceptional, so high heat and constant resistance are no obstacle. You’ll generally use them to drill through ceramic tiles. Though heat resistant, you should periodically cool them in water.
- Multi Hole Saw: Designed to be used for cutting a range of different diameter holes, the multi-hole is notoriously undiscerning when it comes to material. Wood, non-laminated plastics, plasterboard, chipboard, plywood, and non-ferrous metal (except stainless steel) can all be cut through.
Finally, two separate configurations allow for on-the-fly adjustability:
- Adjustable: Adjustable hole saws allow multiple sizes of holes to be made with the same machine. Portability is improved since everything is contained within a single unit, and you’ll be able to work with various materials without changing up.
- Circle Cutter: One, two, or three adjustable teeth sit on a platform with the pilot bit. Adjusting them allows users to cut holes of almost any size, even beyond a foot in diameter. Superbly flexible, but they’re quite tricky to use.
How to attach a hole saw to a drill
Hole saws pose potential danger, so knowing when and how to use them is key. Whether you’re cutting through wood or dealing with ceramic, you’ll start by properly attaching the hole saw to the drill.
Here’s a simple step-by-step:
- Determine Necessary Size: Firstly, check your requirements and set the appropriate size hole saw. Cutting through metal? Make sure there’s a bottle of cutting oil or lubricant close at hand before starting.
- Select Your Arbor: If using a detachable arbor, determine the correct one for your hole saw to fit into. At the same time, ensure you have an arbor that will fit your power drill’s chuck.
- Fit Arbor: Now your arbor is selected, insert it through the back of the hole saw.
- Screw Hole Saw and Arbor Together: Screw the hole saw onto the arbor thread, not stopping until it feels as tight as possible. If adjustable, the arbor should protrude past the teeth by around 3/8 inch and then tighten using the set screw.
- Tighten the Hole Saw: Insert the end of your arbor into the drill chuck. 18 volts is the minimum requirement – anything less won’t produce the necessary torque for proper cutting.
- Tighten Chuck: Screw the arbor in firmly until it is securely held by the chuck.
How to Use a Hole Saw Perfectly
Hole saws seem misleadingly easy to use. It’s no mere matter of choosing a spot before pressing down with your drill, and practice must make perfect until you’re confident. During your first few attempts, try using a practice workpiece.
Follow these steps:
- Drill Your Pilot Hole: Used to guide the saw, this goes right at the centre of the hole you wish to cut. As you drill, keep the bit level. If your workpiece is freestanding, take the time to secure it to prevent any spinning or other movement.
- Align Drill Bit: Pilot hole made, it’s time to align your arbor’s drill bit within. Check the hole saw’s teeth are all in even contact with the workpiece. If cutting metal, drip a little cutting oil or other lubricant over the blade before starting.
- Keep it Steady: You’ll want to start slow, holding the grill tightly and squeezing the trigger lightly. Only a moderate amount of pressure is needed to push the saw through – instead of forcing it, focus on keeping the saw level.
- Eject Dust and Chippings: Take regular pauses so you can back the drill out from the hole and clear it of dust and chippings. Doing so helps avoid clogging and overheating.
- Saw from the Other Side: To make the final hole smoother, finish your cut from the opposite side, if possible.
- Remove Slug: The slug is just an easy term for the waste material that collects in your hole saw. If you have an ejector spring arbor, it should pop right out – otherwise, dig it out manually.
That covers the basics, but what if you need to drill holes deeper than your hole saw allows or widen an existing hole?
Here’s how to cope with both situations, starting with deep drilling.
- Cut to Depth: As detailed above, use your hole saw to achieve the maximum depth possible.
- Use Your Chisel: Grab a chisel and start cutting out as much wood as you can. This should let you go a little deeper.
- Continue Cutting: Once the wood has been cleared, realign your saw and continue until you reach the required depth or make a through-hole.
- Use an Arbor Extension: For added depth, consider buying and attaching an arbor extension. These are long metal rods with a socket on the end to accept the shank from your arbor, and you can use one to reach deeper into holes than conventionally possible.
As for enlarging existing holes, here’s how you play it:
- Clamp Some Scrap: Take some scrap wood and clamp it to your workpiece to provide a solid point on which to secure your drill bit.
- Mark the Centre: One of the problems with enlarging holes is the lack of a pilot hole. Mark the centre of the existing hole on the other side as you clamp your piece of scrap wood.
- Cut: With scrap wood securely clamped and marked, drill a fresh pilot hole into it and then continue as normal.
How to Care for Your Hole Saw
Knowing how to use your hole saw is one thing, but don’t forgo proper care. Here’s the low-down on cleaning, sharpening, and storing.
Cleaning
Regular cleaning extends the life of what can be a very expensive tool. After each use, clean your hole saw thoroughly to rid it of any dust or chippings. Left to their own devices, such detritus can become stuck or else damage the teeth – it’s worth keeping in mind that they’re very tough to sharpen once dulled.
It also helps to back the saw out occasionally while cutting to remove waste material and keep the blade cool. Apply even pressure as you cut to avoid tooth strippage.
Sharpening
If your hole saw should become dulled, the relatively low cost of replacing the blade should be enough to dissuade you from sharpening. If you’re set on sharpening, you can use a hand file on each individual tooth, though a hand-held electric grinder will slightly cut down on elbow grease. A bench grinder also does the job, but extensive time and concentration is required – honestly, it’s largely advantageous to replace instead of re-sharpen.
Storing
Finished with your latest project? Take a few minutes to see your hole saw properly stored if you want it ready to go next time round. It’s not too hard – simply store your hole saws in a dry place where they won’t be knocked about or corroded by the elements.
Safety Equipment When Using a Hole Saw
The chance of injury falls significantly when you don the right safety wear and employ the proper safety equipment. Hole saws don’t require much, but what they do require is vital.
Outfit yourself with:
- Eye Protection and Mouth Guard: To prevent dust or splinters getting in your eyes or being inhaled.
- Safety Gloves: To maintain proper purchase through cutting.
- Ear Protection: To safeguard your hearing while drilling for extended periods.
If working with any material save wood or cast iron, cutting oil or lubricant must be used to reduce resistance and extend the saw’s life. When using a more powerful drill to cut through a tougher material, the machine may experience ‘kick back’; under such conditions, you’re well advised to use a drill with a side-handle to afford additional stability and control.