Plasterboarding is an ideal way to finish stud walls; installation is generally easy, materials are generally inexpensive, and there is a whole host of plasterboard options beyond the average to fit around more niche requirements.
Plasterboard is a versatile construction solution accessible whether you’re an experienced professional or a DIYer just dipping your toe into light construction work. Choosing your plasterboard, cutting it to size, fixing it to your stud walls, and using all the right tools in the process is so straightforward that we can cover everything you need to know before you finish reading this article.
What is Plasterboard?
You know those vertical wooden frames that mark out walls in a half-finished building? Those are stud partitions, and they’re a fundamental element of modern construction. It used to be that stud portioning was covered with lath and plaster, or that solid brick was used and then covered with a layer of plaster.
But that was way back in the middle of the last century, and such methods consumed too many man-hours. These days, we tend to use plasterboard.
How is Plasterboard Made?
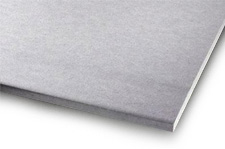
Plasterboard, sometimes called drywall, gypsum panel, or sheet rock, can best be thought of in the form of the humble sandwich. Inside is gypsum plaster, otherwise known as plaster of Paris. To manufacture it, raw gypsum is heated to drive out water and then rehydrated and mixed with a variety of additives to produce a strong and rigid material ideal for construction. The gypsum is then pressed between facer and backer panels. Nine times out of ten, the facer and backer are thick sheets of paper, though a handful of other materials can also be used to fit more specific needs.
Why is Plasterboard Use So Prevalent?
You’re welcome to use lath and plaster across your stud portioning, but you’ll have to free up quite a few weekends to get the job done, and getting it right the first time is going to take a strong measure of luck.
Plasterboard boasts an abundance of benefits, but its prevalence is largely down to convenience. An entire house can be drywalled in a day or two, and the straightforward process is so hard to get wrong that even amateur home improvers can handle plasterboard installation without much in the way of stress or worry.
Finish options run the gamut from 0 (unfinished) to 5 (pristine), accommodating a considerable range of purposes. Also attractive is plasterboard’s sound deadening ability, which can be enhanced by using high-performance varieties or multiple layers.
Remarkably easy to produce, convenient to fit, and wonderfully versatile, plasterboard is naturally a major part of the construction industry. Such resoundingly attractive benefits help see over 85,000,000,000 square feet of gypsum board used annually worldwide, with annual revenue in the United Kingdom alone estimate to rest at a respectable £648m.
Your Ideal First-Step into the Satisfying World of DIY Construction
So, plasterboard is kind of a big deal, but we’re not talking about a material that takes days to craft and years to truly master. When you’re done reading this post, expect to know everything necessary to move from research to practical experience without a hitch.
[Back to Top]
How to Pick the Right Type of Plasterboard
Adaptability is the cornerstone of plasterboard popularity. There are several main types that revolve around their own niche needs, plus various narrower choices within most of those broader categories. You can’t go too far wrong with basic wall board, but taking the time to understand what’s out there only makes sense – it could be that the room you’re fitting out suits a different type of plasterboard down to the ground.
With that in mind, here are the most common plasterboard varieties.
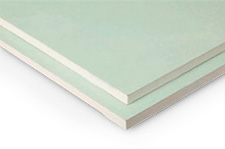
Wall Board
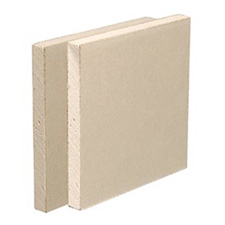 As basic as plasterboard gets, wall board is far and away the most common type you’ll encounter. If you cared to knock through one of your walls, you’d almost certainly end up going through wall board.
It’s what you use when sound levels aren’t much of an issue, extra structural strength is unnecessary, fire-resistance not needed, and moisture not expected. As such, wall board is also the most economical type of plasterboard, although it can be fixed at double thickness if you need added insulation or fire-resistance in a pinch. As a general rule, one side will be ivory and the other will be brown – plaster is usually applied to the ivory face.
Vapour Check/Barrier Plasterboard
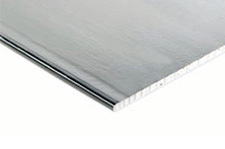 Check the reverse side of vapour barrier or vapour check plasterboard to find a thin metallic film that prevents warm vapour penetrating the board. It’s an addition responsible for protecting your property from interstitial condensation, a form of structural damping that arises when moist air penetrates a wall and then condenses into water behind it.
Nasty complications of interstitial condensation include:
- Structural damage due to the rotting and weakening of timber frames, joists, and rafters.
- Respiratory problems due to the development of mold behind your walls.
- Rise in sound and/or heat transmission due to moisture soaking into insulating materials.
A vapour control layer blocks the passage of warm moist air, reducing the risk of such complications. Any room likely to experience humid conditions, such as laundry rooms and bathrooms, are worthy candidates for vapour barrier or vapour check plasterboard.
Sound/Acoustic Reduction
 All types of plasterboard insulate, but sound/acoustic reduction plasterboard is designed and manufactured to prioritize that purpose. Sometimes insulating materials will be directly applied to the back of the board, but plasterboard designed around reducing sound transmission will generally have a special core that has been made appreciably denser than average. As the core of your plasterboard gets denser, its ability to absorb sound vibrations increases.
Core materials and sound-deadening panels differ according to need, so an acoustic plasterboard made to prevent outside sound penetrating the walls of your study will perform slightly differently to one crafted around keeping sound from escaping a home studio. Do your homework before you buy. If you’re fighting back against outside noise, it might be worth measuring the decibels to find an option that matches. No need to buy any expensive gadgetry – you’ll find plenty of sound level meter apps for your smartphone.
Fire Board
 Plasterboard boasts natural fire-resistance. Gypsum contains plenty of water, so panels unlucky enough to be exposed to fire will burn relatively slowly, and the thermal energy produced will be converted into steam and diverted away from the plasterboard, keeping the opposite side cool until moisture runs out or the panel is breached.
Fire-resistant plasterboard mixes gypsum with a range of additives, including glass fiber, to create a specialized core, and the backing itself will be constructed using fireproofed materials. No plasterboard will curb a fire indefinitely or entirely, but even the thinnest of fire-resistant boards can supply an hour or so of protection, while others can form a barrier for several more.
You’ll recognize fire-resistant plasterboard by its distinctive pink face, and you’ll use it across rooms where fires are more likely to start and spread, such as the kitchen. Levels of protection differ markedly, with more expensive fire board curtailing conflagration for several hours. Most residential properties don’t require such protection, but heavy-duty fire boards are often recommended or even legally required for commercial properties.
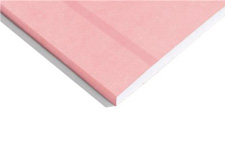
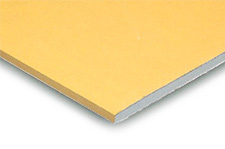
Water Resistant Board
 You don’t want to confuse water-resistant plasterboard with vapour barrier/vapour check plasterboard. While the latter blocks moisture vapour, the former incorporates water repellent additives within its core to prevent the penetration of liquid water. It’s the type of plasterboard you’re going to use for extremely wet or humid areas, such the behind the tiling in your bathroom. Water-resistant plasterboard can be distinguished by its green face, and it is usually left unplastered since plaster will quickly soak up moisture.
Impact Board
 Properties often require stronger boards across certain areas. High-traffic zones, such as halls, must be able to resist day-to-day knocks and bumps, and dense core plasterboard is essential to make that happen. Such varieties are commonly known as impact board. If any area will encounter high footfall or regular bumps, the added durability of impact plasterboard is ideal. And if a wall is expected to bear more weight, the added load carrying capacity can be vital.
A high-density core is reinforced by facers made from heavyweight-paper or fiberglass mats, and reinforcing fiberglass mesh is sometimes embedded in the core to resist penetration. Beyond superior durability, impact plasterboard promises straightforward repairs since the denser core and tougher faces are more resilient to additional work.
But not all impact boards are created equal, with factors covering:
- Surface Abrasion: Measures the depth of abrasion before penetrating the outer board.
- Surface Indentation: Measures the plasterboard’s ability to resist dents from small, hard instruments.
- Soft-Body Impact: Measures the plasterboard’s ability to resist impact damage from heavy yet soft objects.
- Hard-Body Impact: Measures the plasterboard’s ability to resist impact damage from a large hard object.
4-in-1 Plasterboard
 Though rare in residential settings, 4-in-1 plasterboard is a modern innovation able to resist impact, fire, water, and vapours. Such resilience is highly prized for certain construction projects, but the high price and relative rarity of 4-in-1 plasterboard see it typically reserved for special projects.
Tapered or Untapered
Most guides only cover the type of plasterboards available, but plasterboard edge varieties are also worth considering.
- Untapered Plasterboard: The edges are squared, so a hidden seam is hard to achieve without applying additional plaster.
- Tapered Plasterboard: Edges taper down. It’s a more common style that delivers seams that are very easy to conceal.
How to Cut Plasterboard
Cutting plasterboard creates a fair amount of dust, so let’s start preparing the room by removing any electronics and covering the carpets and furniture with construction tarps. Keep the room well ventilated, and, if possible, avoid cutting plasterboard during spells of hotter weather.
Next up, you’ll need to collect your tools. It’s a less colossal undertaking than you might imagine – in fact, cutting dry wall commonly requires nothing more than a simple Stanley knife and a straightedge. That said, other tools you might like at your beck and call include:
- Measuring tape
- Straight Edge
- Drywall Saw
- Drywall Keyhole Saw
- Drywall Rasp or Sanding Block
- Pencil
Any saw can do the job, but even the sharpest of timber saws is dulled quickly by plasterboard. Handling a larger project or ongoing work? Is so, a special saw for plasterboard justifies itself. They’ll cut through without blunting themselves – at least not as readily as other saws – and you’ll find them ideal of cutting out openings.
Beware the common rookie error of marking with a pen or marker. Ink can bleed through the paint, so a pencil should be your go-to writing and marking implement.
With your room prepared and your materials gathered, you can pop on a particle mask and eye protection and then get to cutting. That involves either scoring – best for cutting to length or width – or sawing – best for cutting openings and holes for anything from windows to light switches.
Scoring is a little easier, with the following straightforward steps guiding even the amateur workman through without incident.
- Use a pencil to mark where the plasterboard needs to be cut. The light grey side should face outwards, with any writing on the back.
- For straight cuts, use your straight edge as a guide, then slice along the paper and into the core with your Stanley knife.
- Supporting the plasterboard from the back and applying pressure to the front will cause the piece to break evenly and cleanly at the join you just cut.
- The plasterboard should still be connected by the paper of the rear sheet, so use your knife to complete the cut. Don’t simply rip the two parts apart unless you feel like damaging the surface.
- Should the edges feel a little rough, use a sanding block or drywall rasp to smooth them out.
If you need to saw cut-outs into your drywall, be sure to make them on the front side where possible. Mark out the location for each cut, then cleave a central opening with your drywall hammer. Use a keyhole-style saw for smaller cut-outs, such as those for electrical boxes. For larger openings, such as for windows and doors, use your drywall saw. Again, you can pick up your rasp or sanding block to smooth the edge, which will almost certainly be necessary after taking a saw to your plasterboard.
[Back to Top]
How to Fix Plasterboard Correctly
Plasterboard can be fixed using screws, nails, or adhesives. For the lion’s share of construction projects, screws fit the bill since no heavy hammering risks damaging the core and little guesswork is required to get things right.
Here are the steps you need to follow:
- Find the Correct Position: Plasterboard should always be hung with the grain running horizontally instead of vertically to maintain strength. Boards should be staggered so seams aren’t on the same stud – this reduces the risk of cracking.
- Take Measurements: Measure from edge of stud to centre, using a spirit level or straight edge to mark lines down and across your plasterboard to indicate the centre of the stud framework behind.
- Drive in Screws: Place each board in its intended location and drive some screws into the edge. Don’t go too far – simply break the surface of the paper. Place them at regular intervals of around 100-200mm.
- Firmly Screw the Plasterboard: Finally, use a manual or electric screwdriver to send each screw home.
How to Pick Out the Right Plasterboard Tools
Cutting and fixing drywall is easier than most people expect – the main impediment to success is not a lack of experience or expertise. Rather, it’s the wrong equipment.
Here are just a few of the tools you’ll need close to hand.
Plasterboard Hammer
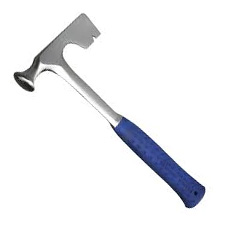 Looks a little like a hammer/axe hybrid, with a tapered head to one side allowing you to strike through the board for easy access with your saw. They should create a waffle contour to help lock the compound.
 Your cuts must be level, and that means using a spirit level. Look for large straight ones that can double up to be used as a handy …
Straight Edge
Your lines need to be straight and clean, and that’s only going to happen with a straight edge.
Stanley Knife
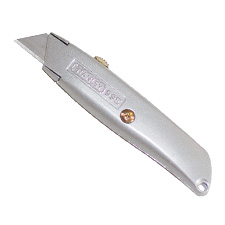 Make sure the blades are kept sharp, and use a thicker knife that can be gripped securely in one hand.
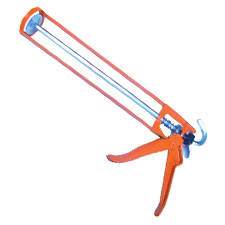 Most people secure their plasterboard using screws, but a vocal minority stick with glue. Count yourself among them? You’ll need a mastic gun to apply the sealant, and preferably a larger one to prevent constant tube replacements.
Drywall Saw
 Designed with large serrated teeth to rip through the paper face and gypsum core of your plasterboard without demanding too much in the way of elbow grease, drywall saws also incorporate a point you can use to break through the material if no drywall hammer is available.
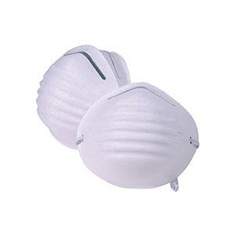 Plasterboard dust can be inhaled during cutting and get in your eyes. Nobody needs that, so outfit yourself with a safety mask and a pair of googles.
Drywall Rasp or Sanding Block
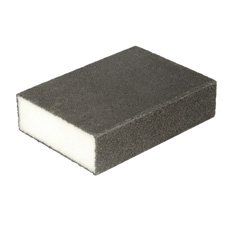 For smoothing out those edges after you’re done scoring or sawing.
Finally, you’ll find yourself choosing wall plugs and fittings. Selecting wisely demands a little more attention.
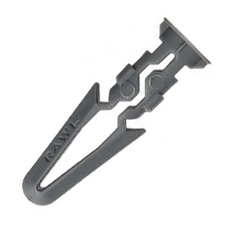 A wall plug serves as an anchor. You see, the gypsum core of plasterboard is relatively soft and brittle, so a special anchor is necessary for a secure fit. Plugs used for masonry or nails will be useless when it comes to plasterboard.
A universal wall plug will probably be made from nylon. Look for plasterboard varieties with thicker sections that expand outwards like an umbrella when inserted. Drill a hole or simply tap the plug into place, knocking the area to make sure it’s hollow. You can then fit the screw.
 You’ll need a more resilient fixing to hold larger, heavier items, such as televisions and radiators, and those fixings can’t always be fitted where timber frames rest behind the plasterboard as natural anchors. A fixing expands the area that can hold stress and increases the amount of stress it can take. Err on the side of caution by using more fixings than you might think necessary
As with a plug, the fixing goes into the wall first. The difference is that fixings are designed to take heavier loads. Metal beats plastic for the truly hefty fitting.
I’ve been getting ready to use some plasterboard, and I think that knowing what tools can make it easier would be nice. I’m glad you talked about fixings, and I think that would be good for me to know. I’m going to have to look for some resilient fixings and figure out what my options are!